Project Description
Product Details
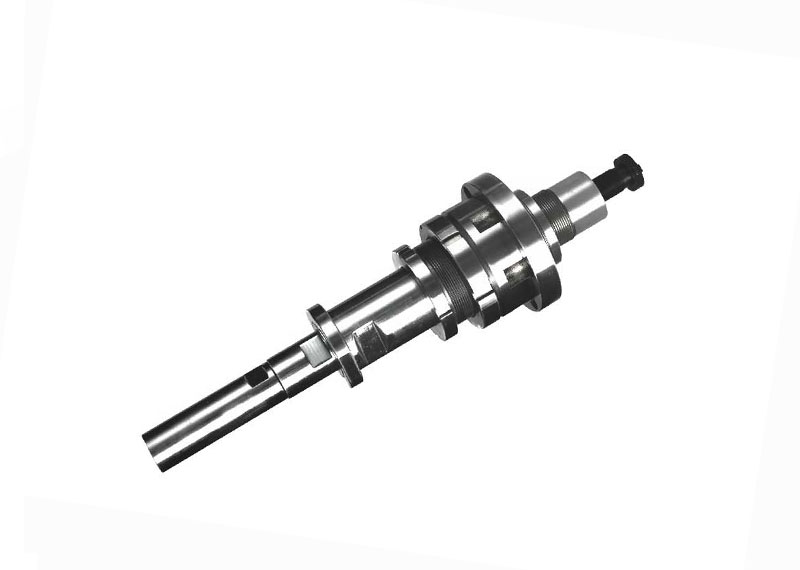
Tow-stage ejector installation guidelines:
- The process through holes into A plate and clamping plate, screw holes into B plate, and 6 screw holes into the champing plate ( holes dimension refer to ” Dimension chart ” ) . Please note that all holes should be homocentric and perpendicular to the parting surface.
- Fix the flange onto the champing plate by hexagonal socket head cap screw, pre-tight the screw and lock it after other parts installation.
- Turn the champing sleeve into the flange, screw the sliding bushing into B ejector plate, lock the need of the ejector on the ejector A plate by Screw.
- Adjust the position of the champing sleeve and the champing plat the (flange) to preset the travel stroke H1, and then fix the slotted nut.
- The internal thread at the end of the ejector bolt had been threaded in order to connect with the central bolt of the injection mold. Different threads for different Two-stage ejectors.
- After installation, carry out a functional test to check whether the individual parts work well and the stroke is applicable. (Recommend test on matched molds machine or injection machines, do not use Lifting Machin).
- The nut had been strengthened in mounting, do not dismount the nut freely anytime to ensure the normal function of the products.
- Request precise installation (only 1 set for 1 mold). Make sure the STROKE is exactly applicable, otherwise the product would b easy to damage.